Monday, October 28, 2013

Something to show!


I'm typing on the ipad blogger app, which has very limited functionality.  So pardon the spacing, etc....
I have actually managed to finish a few things the last week or so.   The above piece was from a class i took with George Siciliano over three years ago.  You may remember I spent all three days of the February retreat this year making three of the blocks for this.  Three days!
It's finished now.  I finished the quilting before the class with wendy Butler berns, but i never consider a piece finished until it has a label and sleeve.  Problem was, I didn't have a name I liked for it.  So i put a picture on facebook and asked for suggestions.  My friend Terry suggested "Mystic Thistle", which I loved!  

The dress I made on Saturday.  I started at lunchtime with three yards of fabric.  By dinnertime I had a dress.  I wish more projects could be finished that quickly!  (I should note there is no zipper in this dress.  It's a very easy pattern!)

Shoot, these are out of order.  I quilted the tree project, which also needs a name.  I love how it looks on the back.  I may have goten that from my BFF Mary, who always looks on the backs of her quilts to see how she's doing. 
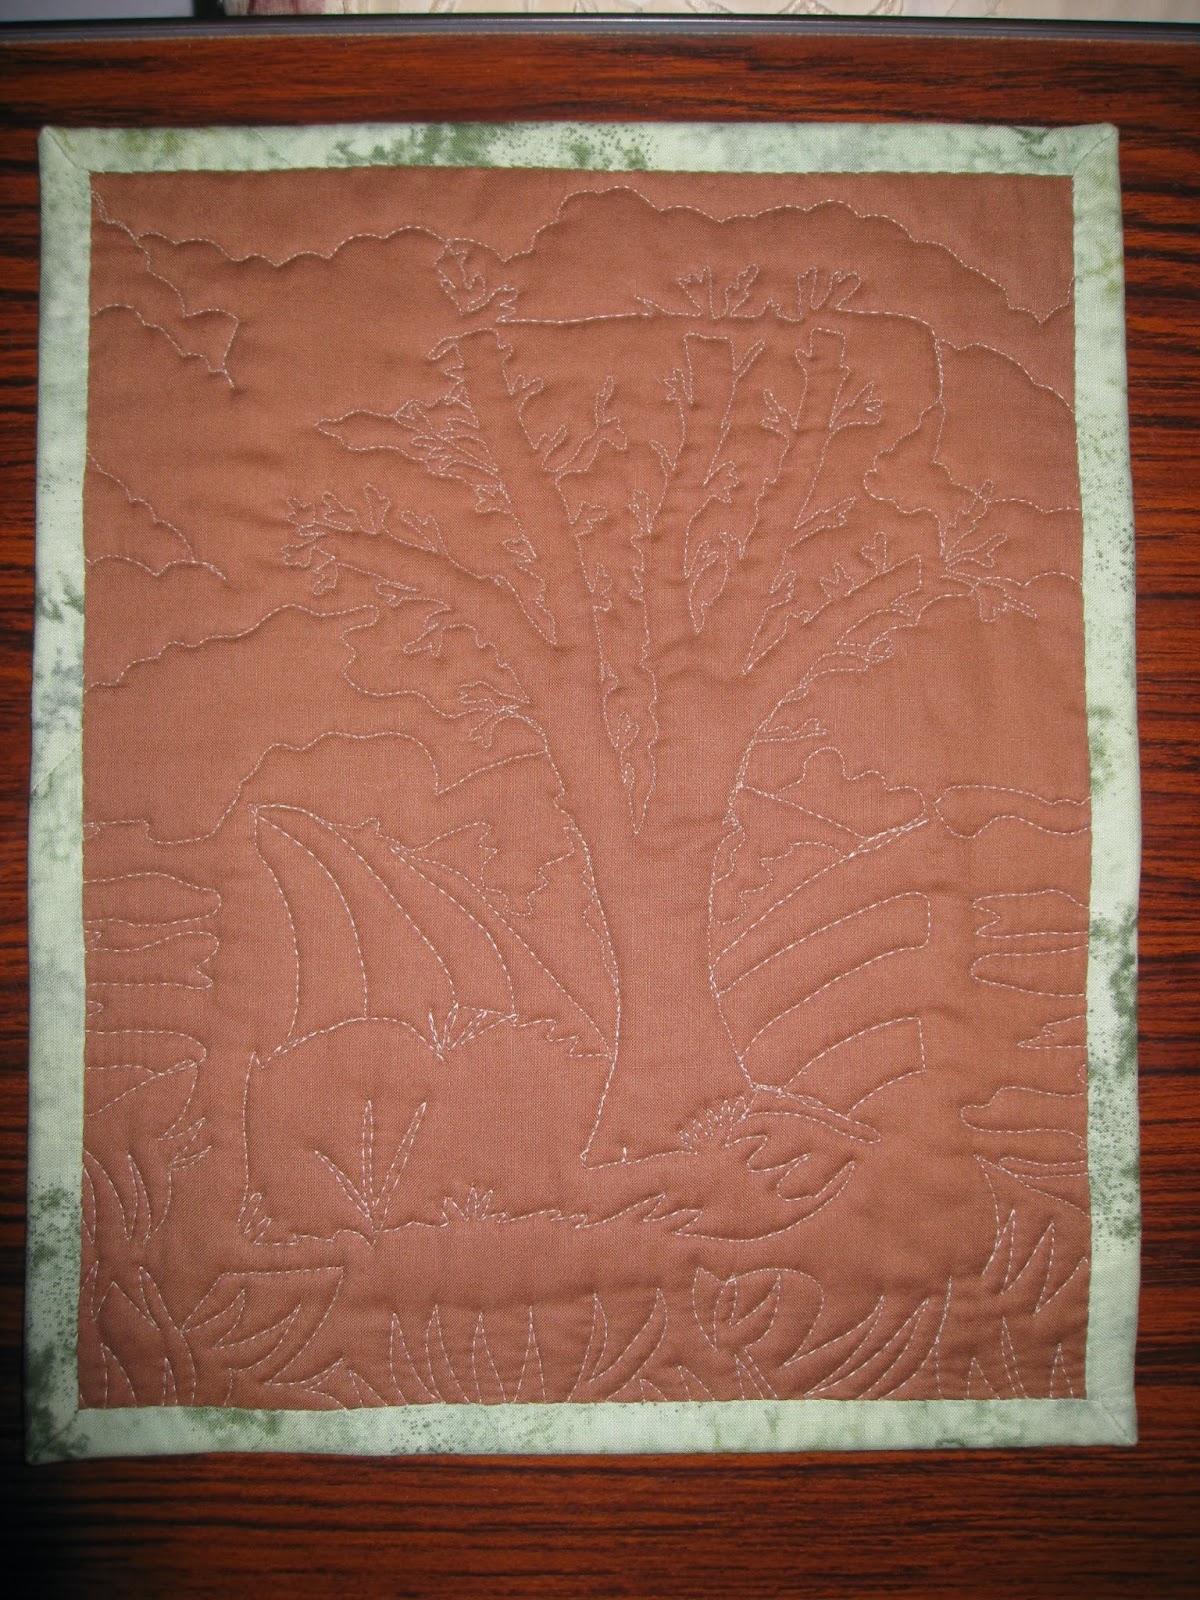
I added the leaves since the background has flowers in it.  So obviously it is a springtime scene.

I was thinking of adding some beads as flowers on the tree.  I laid them on in the picture below.  So, beads, or no beads?


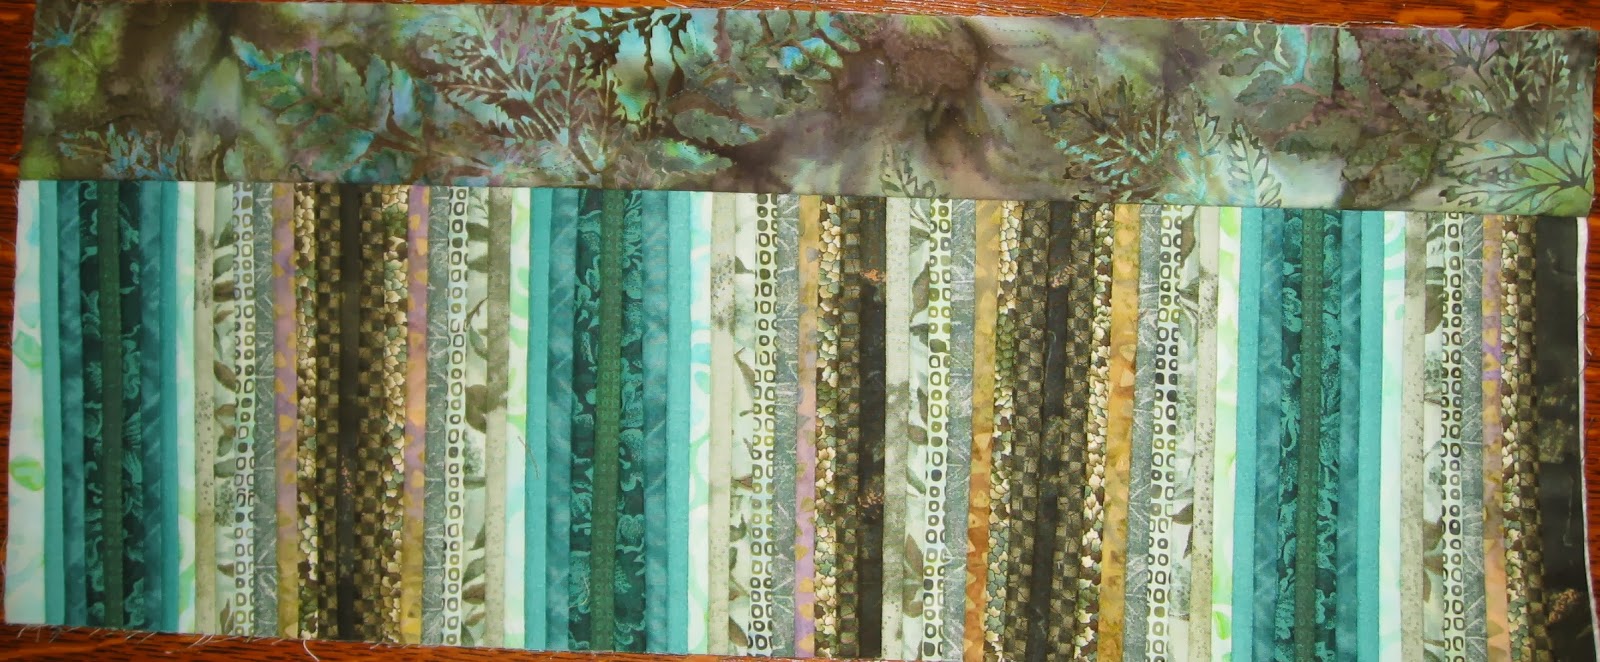
The raffle quilt top is finished at last.  This is only part of it.  I was marking the quilting on a sheet of vinyl to test out some ideas and spacing.  It's going to be hand quilted.  So we need to get started very soon.  The quilt show is just under a year away.

Thinking "green" this week brings me to the Holiday shopping season.  The stores are jam-packed with stuff they think we want and/ or need.  It's the same garbage every year: decorative tableware, fake pine wreaths and garlands, serving pieces, kitschy little decorations....
 First, in spite of what Martha Stewart would have us believe, we don't need ANY of this junk to enjoy our holiday.
Second, if you do "need" to decorate everything, why can't you store and reuse the same stuff?  Your guests won't care if the napkins are the same ones you used last year, will they? (Note i am assuming you are using cloth napkins?)  it's the people who aree important at holiday gatherings.   NOT the stuff!


I am grateful for:
The time of year when being warm feels good to me.
Potato soup
Finishing things
Crawling back into the covers on a cold morning
Admitting defeat

Wednesday, October 23, 2013

A very fun class!

The Museum Quilt Guild enjoyed a visit from Wendy Butler Berns last week. We only enjoy a national teacher every couple of years, so it's always exciting! 
Not only is Wendy a warm and energetic teacher, she is loads of fun to be around!


 The class I took was this tiny tree.  Part of her Picture Image Applique series.  This project uses fabric manipulation to add texture to the picture.
This is one of Wendy's samples.


This one is also Wendy's


I didn't put a lot of time into choosing fabrics for the class.  I basically grabbed a light, medium and dark in the colors I thought I would need.  I was disappointed at first that my fabrics were boring, But it made choosing what to use where in my project much easier!


And I was very pleased with the results!!
Since there are flowers in the background, I plan to add green leaves- and maybe some blossoms to my tree when I embellish.


My friend Kathi  made a piece that ended up having a Halloween flavor to it.  Isn't it awesome! (I suggested the moon)


We laid them all on a table at the end, but it was hard to  get a good picture of them this way! 


Fortunately Wendy took a group picture!  Such a fun day!

The following day, we enjoyed a lecture with Wendy about the stories behind quilts.  She once again had a great show and tell of some of her work. 

I loved how these looked laid out this way- like the dark kitty is a shadow of the light one.  I bought this pattern, of course!
Wendy has to simplify her original quilts to make them into a marketable pattern.  Here is a perfect example of that.


The details she ads to her quilts are worth a closer look.  The butterfly here is 3-d.  I never got a chance to ask how it was done.


And look at the hair on this child!


My friend Jeri shares interesting links about environmental issues on facebook.  I mention this because it is important to stay informed- no matter the issue.  You can say you support this or that, but not know much about it.  I know I have been guilty of that in the past.

I am grateful for:
The ten "extra" minutes of sleep I get by setting my clock ahead, which allows me to hit the snooze once. 
Apple Crisp made with my grandmother's recipe.
Watching the kittens when I bring something new into the "nursery".
A great sewing day!
Rereading a favorite book and getting to "the good parts".

Wednesday, October 16, 2013

But First...

  I'm posting from the blogger app, so I have very limited options.  Sorry.  I'll try to find a chance to come back to add links and move the pictures around.

My husband has been away on a hunting trip for the last couple of weeks.  My first thought was that I would get SO much sewing done while he was away and I didn't have to stop sewing if I didn't want to when it was time to cook, or whatever.  
(Of course I still had to go to work and take care of the kittens, and do the laundry....)

 I had fabric I was dying to make into an early Fall dress using a pattern I got quite a while ago at some quilt shop or other.   But first...                                        

I had layered this table topper quilt back in the spring.  It's made with leftovers from the Star Light, Star Bright (Scrap Therapy) class I taught several years ago.  I had a bit of fun with the quilting.  The center is meant to sort of look like a poinsettia blossom.

And a sort of orange peel thing in the narrow border.  Very easy, and fun!

Then in the outer border, which is 8 inches wide, I did free form feathers.  I don't recommend doing it this way, but I don't hate how it came out.

Then I found a bag of bits leftover from a couple of projects.  I put them together because I thought they would look nice together.  Kathryn Schmidt (Rule Breaking Quilts) was sort of my inspiration for this.  She has done some blog posts about her "Anything Goes With UFOs" class. (Look here http://quirksltd.wordpress.com/classes/ )  Step one: put your bits and pieces on the design wall.  I ended up rejecting the stripy piece in the center.

This is how it ended up- after a couple of days of  staring and moving things around and cutting and fitting and tearing out and trying something different.  It's a nice size for a crib quilt, but I think it's a bit much for any baby.  It might end up as a tote bag.  Mostly I had fun doing this.  I didn't really need a new dress anyway.

Tomorrow I am taking a class with Wendy Butler Berns, who is the national teacher my guild sponsored this year.  So hopefully I'll have something fun to share after.

Do you have an old appliance in your basement?  I do.  It's a "perfectly good" freezer which is somewhere around 25 years old!  We keep jugs of water in it part of the year when it is more empty to prevent it from having to cool a lot of empty space.  But it is still very inefficient. It needs to be replaced, and disposed of properly of course!  Most retailers will do that for you when they deliver.

I am grateful for:
Bake sales at the college because they usually have brownies.
Accepting my own limitations.
Soup weather! (Broccoli cheddar to get things started!)
Cuddling with George in the mornings.
Wine O'Clock

Saturday, October 5, 2013

Ann Brauer Demo


 You may remember this purse I made using techniques Ann Brauer uses in her work.

Since I was obviously an expert after doing one project, I was asked to do a demo on this technique at my guild meeting a couple of weeks ago.

I thought I would share it here as well.


The first thing to remember is that to do this skinny strip technique, you need a LOT of skinny strips.   You are using 3/4" strips.  They finish at 1/4".  So if you want a 10 inch piece, you need 40.  And when you choose the fabrics, leave those pieces you don't think quite "go". They will add a little sparkle to the piece.  This is the before and after of the fabrics I used for my purse.  See how much better they blend after sewing? But the "odd birds" add a little something here and there.


 So to do this, decide how big you want your project to finish and cut a piece of backing and batting slightly larger than that size.  Pin them together around the edges.  ( you could spray baste if you can use that spray- I cannot)
Mark registration points every couple of inches.  This is to keep the strips straight as it is very easy to slant them as you sew.
See the green sample below.  The strips at one end are skewed.  Of course, if you don't care about keeping them straight you can skip this step.


Lay out your strips the way you want them.  If you overlap them so only 1/4" shows, you will have a better idea of how they will look, but it is hard to work with them at the machine that way.
I usually lay the center strip right on the marked line closest to the center of the batting, right side up.  Lay the next strip right sides together and sew a quarter inch seam.  I use a walking foot.
You can work all the way out from the center on one side, the flip it to do the other, or do every other side out from the center.  Just make sure you know where you are so you don't mix up which strip to sew next.


This shows the difference in size from strips to finished piece. The taupe sample has 19 strips.  The bright one has 23.


I don't know yet what the bright one is for.
 I brought it to pass around so all could feel a piece of the fabric you get with this technique.  It is softer than many thought it would be.

I would really like to do one like this next!


Ann shares her process on her blog now and then.  You can see how she assembles her larger pieces in this post.

A quick "green" thought.
Let's all remember that being environmentally conscious is a lifestyle, not a fashion statement.  Most places selling t-shirts, bags, bandanas.... with eco-friendly logos or sayings on them just want to sell you something.  So don't buy it unless you need a new one anyway.  And then look for one made with earth friendly materials.

I am grateful for:
Being part of a group wrapping needy friends in our love.
A rainy day so I can catch up on the puttery stuff inside.
Cuddling my babies at the shelter one more time.(But I hope they aren't there the next time I go)
I finally got my ear unplugged!
Walking through dry fall leaves and listening to that sound they make.