Friday, November 20, 2015

Playing with Markers and Alcohol (It's not what you're thinking)

I'm doing a demo at guild this month on how you can design fabric using Sharpie markers.  Other permanent markers may work, but all of the tutorials I have seen say Sharpies.  It works like this:
The Sharpie markers contain permanent ink, which will not wash away with water. Permanent ink is hydrophobic, meaning it is not soluble in water. However, the molecules of ink are soluble in another solvent called rubbing alcohol. This solvent carries the different colors of ink with it as it spreads in a circular pattern from the center of the shirt. (according to stevespanglerscience.com)


So the first thing I tried, years ago, was tie dying. There are a few sites that show different ways to do this, and I don't remember the exact one I used.  They're all similar, but I love the monster t-shirt at the bottom of this one!
I colored this one first

above piece wrapped on a dowel with alcohol applied

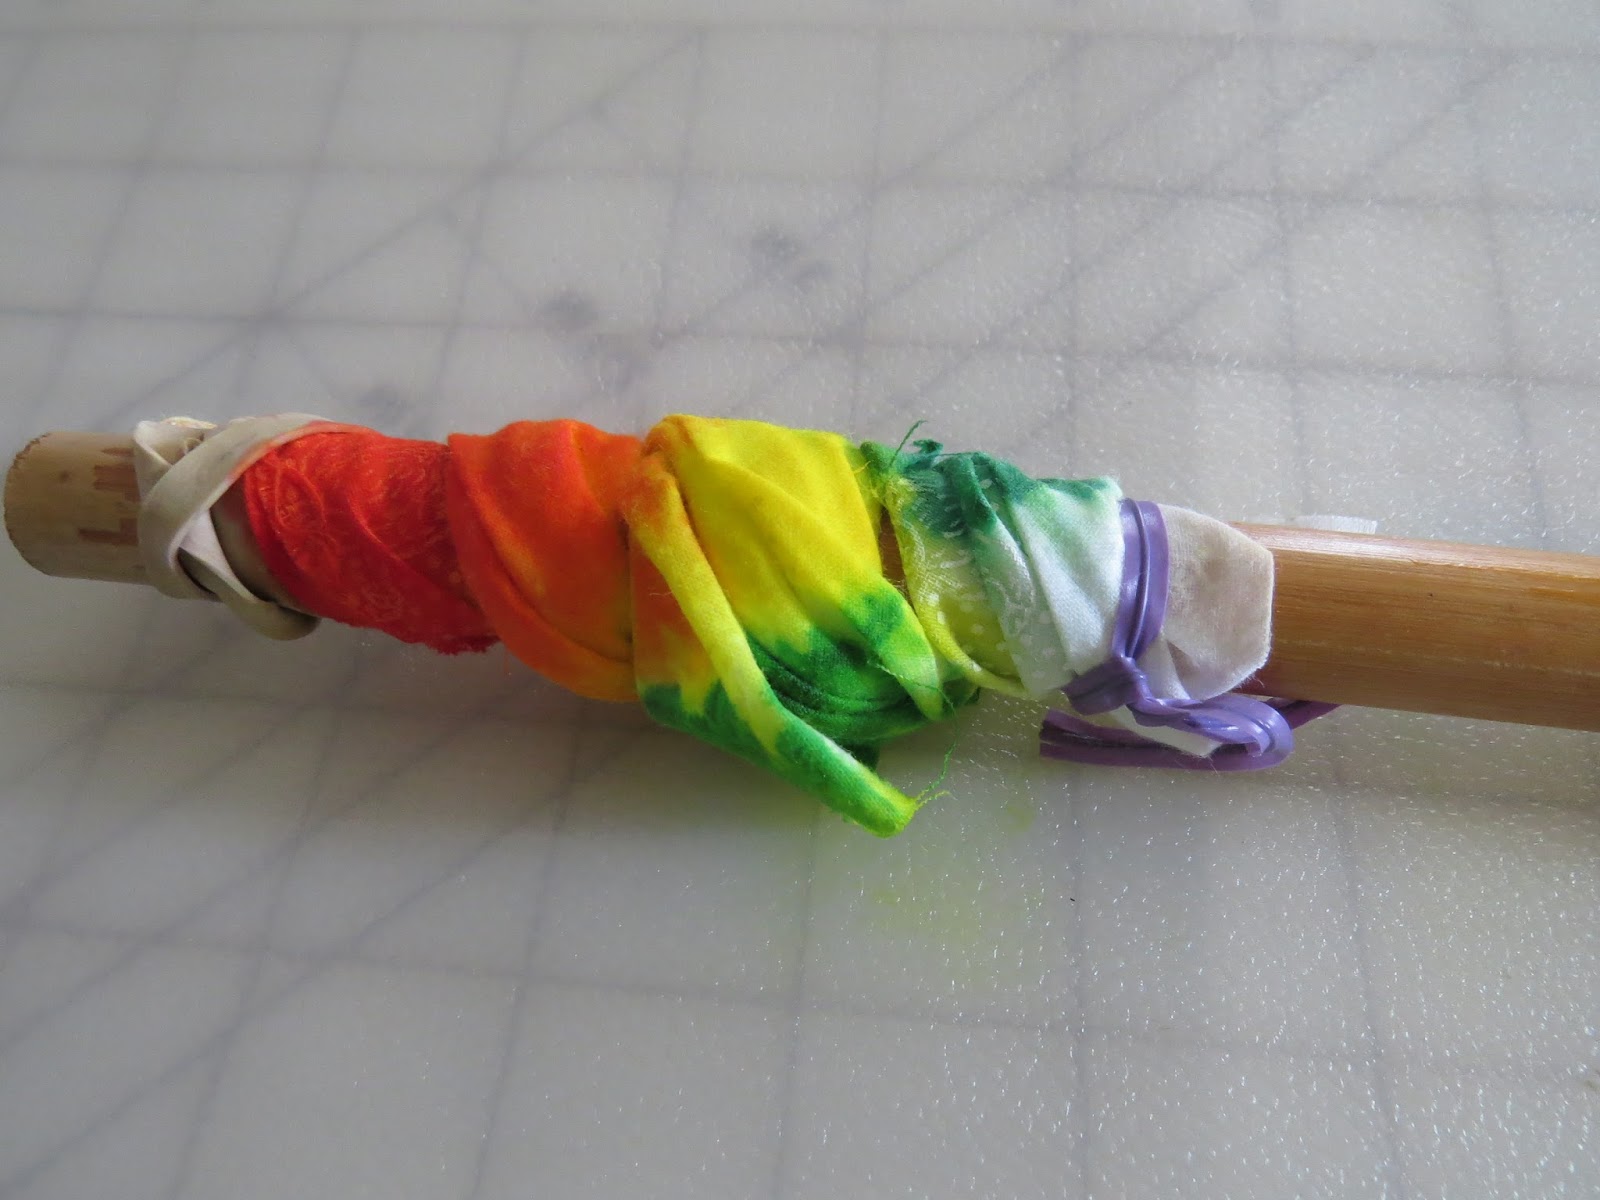
Wrapped on the dowel first, then colored, with alcohol applied
The one I colored first

The one colored after wrapping


More recently, Quilter's Newsletter had an article on doing image transfer. Please note: This link does NOT have the instructions, but is a link to the issue.
We did this activity at the ArtCGirlz meeting in March. 
I've been having fun with that one, finding ways to use it. Here's how, if you want to try it yourself.  Good images can be found by doing a google search for coloring pages.  Just remember, simple is better.
NOTE- the colors are not as bright as the original, as you can see here. Also, directional images will be reversed.


You will need:
8 1/2" x 11" white card stock
Assorted Sharpie markers
11" x 14" piece of clean muslin
10" x 12" piece of white cotton
scotch tape
rubbing alcohol
dropper or sponge paintbrush
credit card or flat rubbing tool
iron
I also keep a paper towel, scrap fabric nearby to blot excess alcohol


Step 1:  Color your selected image well.  Go over it a couple of times to really saturate the paper with ink. (Make sure to protect your work surface with a piece of scrap paper)
 The lower half of this picture is the reverse, so you can see the ink has soaked through in spots. 


Step 2: Lay the 11" x 14" muslin piece on your work surface.  Lay the 10 ' x 12" piece of white cotton on top of it.  (Both fabrics should be crease free)
Place your colored image face down on top of the  white cotton.  Tape in place to prevent shifting.


Step 3: Use the dropper or brush ( I prefer the brush) to spread the alcohol over the surface of the paper.  You need  enough to soak through, but not a puddle.

Step 4: Use your credit card or rubbing tool to push the ink into the fabric.  Press firmly and make sure you go over the entire image.  I go over it once vertically and once horizontally.

If the alcohol starts to make a puddle, use the paper towel to soak it up.  Try not to let it go over the edge of the paper!

Step 5: Lift one or more corners of the paper to see if the image had transferred successfully.

(You can see here some of the alcohol escaped and there is ink past the image)

If it has not, add a bit more alcohol and rub the back again.

Step  6: Once the transferred image is dry, press with a hot dry iron to set the image.  Remember to put your muslin under the image when you iron it to protect your ironing board.


This process is limited to size by the size of the card stock.  As you can see, I tiled the image to make it larger.
You may also notice that some colors transfer better than others.  Red always looks pink


So, what to we do with these transfers??  Here are a couple of finished projects I have made using the images I transferred.


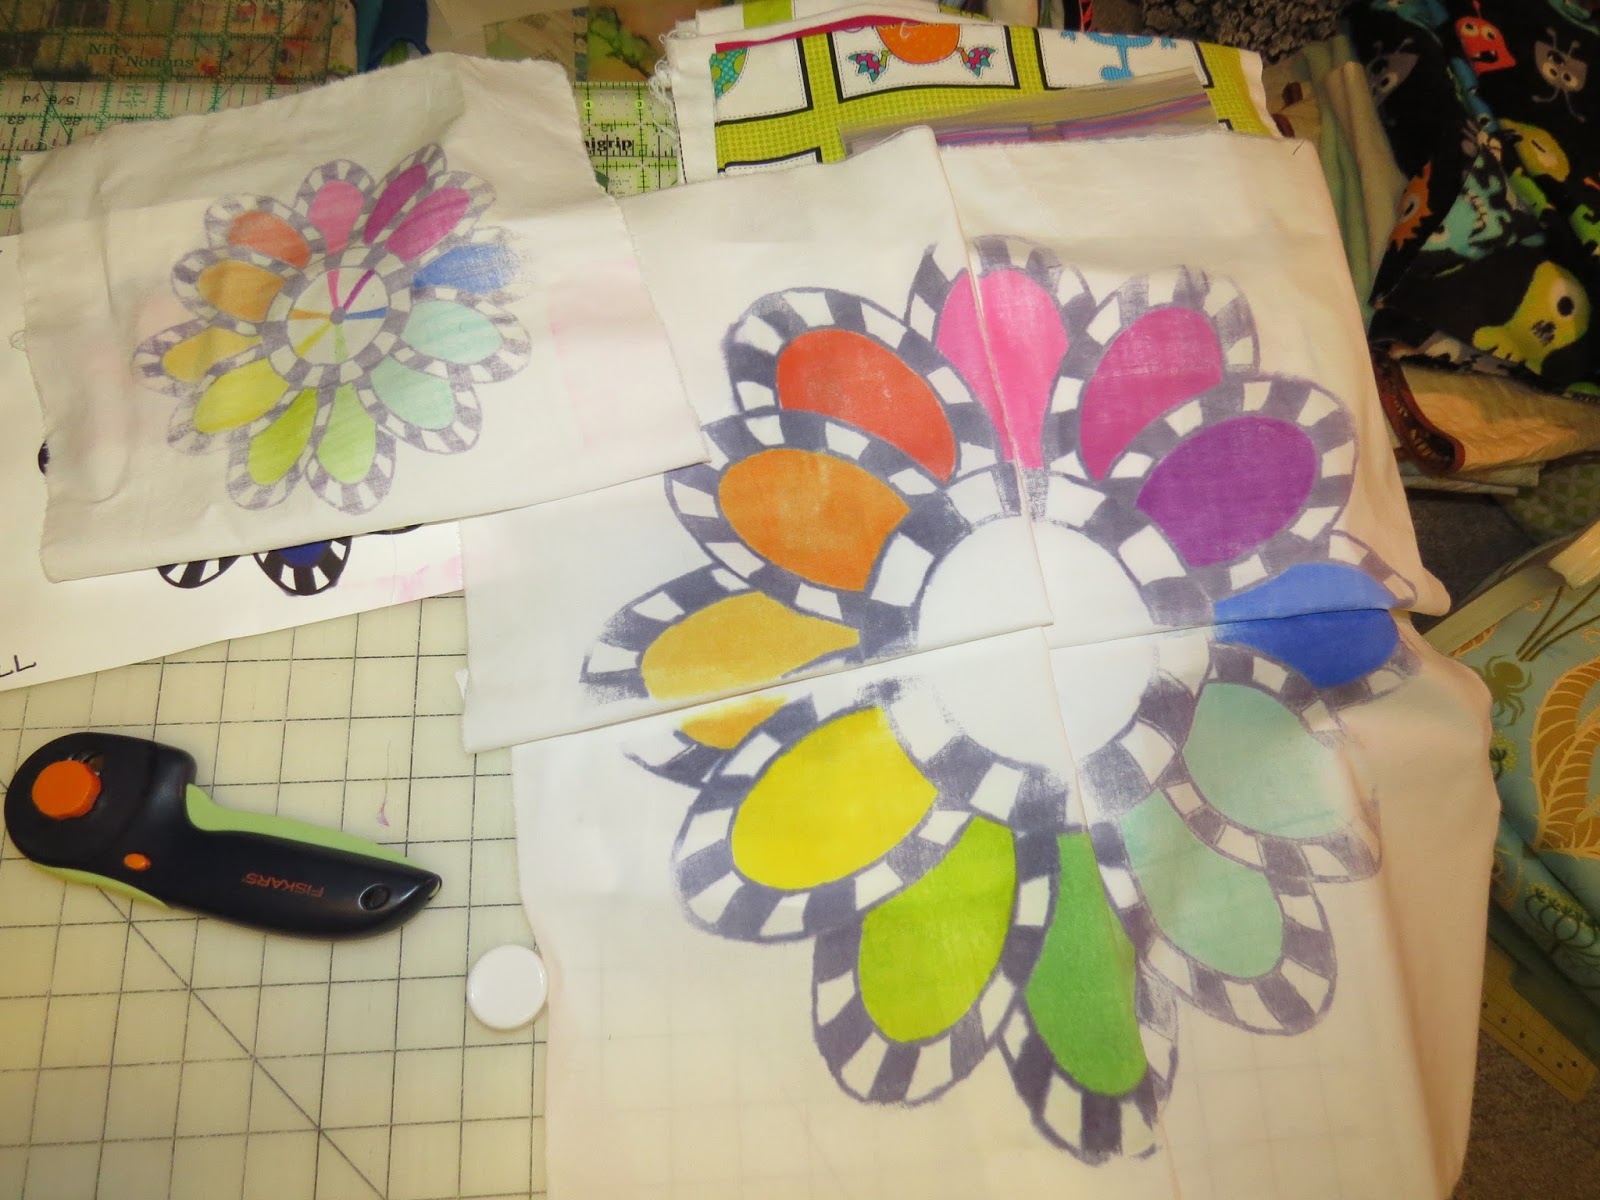
Then Mary Lee found this site, showing how to design your own fabric. I used this technique to create a t-shirt.


I had better results using a dropper than a paintbrush, as you can see in this picture.  The design on the right was done with the dropper.   Also, some of the greens don't seem to spread as nicely as the others.


And similar to that technique is this one, using cups and rubber bands.
lines and dots- don't worry if the ink bleeds a little

After dropping alcohol

After drying and pressing

Add more designs for a really funky fabric!


So I've been a bit like a mad scientist in the lab, playing with these.  (Here's my lab)

No matter which one you try, it's fun and will give you some unique fabric to use in your projects.


 A word about colorfastness- all I have read says that once you heat set it, it is permanent and will not bleed.  However, please use caution when laundering these items!!  I do know that after repeated washing, it will probably fade. 

Monday, November 16, 2015

Making Kaleidosopes

I have never written about the time I spent with Paula Nadelstern last month when she visited the Museum Quilt Guild.  I was thrilled, after all these years of admiring her work- and missing other chances, to be able to take two classes with her!  She is very sweet and funny, and an excellent teacher! 


On the first day, we learned the magic of "Simple Symmetry"

You take a piece of fabric like this.


Cut squares like this


 And end up with blocks like this!


 Of course, eventually you end up with fabric like this.  :-)

 These are the blocks I made in class- you get three of each following the pattern Paula gave us.

And these are the second set I made.  I am still working on laying them out to use  as many as I can.


On day two we learned how to make the "Sixty-Thirty" block.  Easier than it looks, once you get the template making down!


I had brought along some of my collection of Jane Sassaman fabrics, so my block was a bit different from the rest, who were using Paula's .


I  cut out a second block the evening after class.  I hope to have enough fabric to make a bunch of them.


So, what to do wityh the little scraps you end up with?
Mary Lee showed the ArtCGirlz a ball she made using the template she found here.

I had the reduce the size of the pattern to make it the right size for my scraps.
( Sorry- the auto-rotate thing rotates pictures even when you rotate them and save them in a new file name and format!!!)


This is about 3 inches across. Maybe the right size for a very small boy to play with?  

 Here is something I hadn't thought of until recently: the effect of climate change on our pets.  My cat goes outside for short periods of time.  I know there are some who think it's terrible, but I count on her to help me with chipmunk control in the gardens around the house.  Until recently.  Twice within a week, she came in with ticks!  I was able to remove them, and have seen no sign of illness, fortunately.  But for now, she is not allowed outside, until there is a sustained cold to kill the ticks, at least.  It has been warm here for November.  I know one year isn't proof ( last year at this time, Buffalo got 5 feet of snow, remember?)  But I will be asking my vet about treating her for ticks before next summer!

I am grateful for:
The second round of my cold was much shorter than the first.
I found the boots I had been searching for.
Meditation
Some good sewing time this weekend
I get to go spend the afternoon with Jonathan!


Friday, November 13, 2015

Hi, remember me?

I have been absent for a while, as I'm sure you've noticed.  The explanation would sound more like excuses- I've been busy, and sick, and had sick kittens, and haven't been sewing very much, and I spent a few days outside trying to do a last bit of gardening before the snow comes to stay....  Stuff like that.

I still don't have much to write about, but want to try and get back into the habit of posting.  So here's a quickie.

Last September, Mary Lee and I went to the RAFA exhibit at a small gallery in Brockport.  In the corner of the gallery was a very cool plant, which I admired, and was given a cutting by the nice lady at the gallery.  I later learned the plant is called a "Walking Iris", and is grown in gardens in more temperate parts of the world.  But it does well as a houseplant as well.


So I brought my babies home and put them in water to grow roots.  Over the summer, they had a nice partly sunny spot on the screen porch.  Then a few weeks ago I noticed it had a blossom stalk coming up!
 It has been blossoming, one or two at a time, for a couple of weeks now. 
In the morning before it blossoms, the buds are like yellow Hershey kisses

And then- pop!- they open up


Isn't it lovely?


From what I've read, after the blossoms are all gone, it will grow small plantlets, like spider plant babies, on the blossoms stalk.  Soon I'll have babies to share too.

I read an interesting article a couple of weeks ago about "dying green."  I have always believed the body is an empty shell, and what becomes of it is not important.  So spending a lot of money and exposing people to toxic chemicals, wasting valuable land resources for burial... just doesn't make sense to me.  Everyone in my family has been cremated, so I accepted that as the way it's done.  However, I'm thinking I may opt for the greenest option.  I kind of like the thought that someday the chemical components of my body can nourish a tree somewhere, or maybe some exotic flowers.

I am grateful for:
Being able to sleep without coughing last night.
A nice meeting with the ArtCGirlz.
The ability to start again after a "fail"- if I am willing to try.
This adorable video of Jonathan in his jumper thing for the first time.
I finally figured out where all my data was going! ( I think)